
The short version
The Catcierge project is an image recognition and cat RFID-chip reader for detecting cat prey and neighbour cats, made to work together with an automated cat door system. Designed for use with the Raspberry Pi including camera board (but can easily be modified to work on other systems as well).

Background
The Catcierge project came about to solve the problem of our cat bringing home prey through the cat door. Instead of simply not allowing our cat to use the cat door anymore, like a normal person would, I of course set out to find a high-tech solution to solve my perdicament.
My idea was to somehow use image recognition to lock the cat door if the cat had something in her mouth. My first idea was to use Haar Cascades as is normally used for facial recognition, but instead train it to work on cats.
In the process of researching possible solutions I found the Flo Control project that instead uses a controlled environment to get a good profile image of the cat where the prey easily can be distingusihed. I decided to implement this idea instead.
Development story
After replacing the window in our basement stairway with a cat door to let our cat Higgs live a more free roaming life, she soon started delivering dead (and some living) rodents and birds. Obviously this is not something we want so I decided to build an automated cat door that will shut her out when she tries to bring them inside.
When first installing the cat door we were also worried about other neighbouring cats making visits through it, since they sometimes visit through open doors in the summer. So I had some plans to create an automated door that solves that problem as well, by reading the RFID-chip Higgs has implanted in her neck.
I had seen several DIY solutions of RFID readers that require the cat to wear an extra RFID chip on a collar, but that's not what I wanted. So my idea was to find a reader that supports reading the actual ISO 11784/11785, FDX/HDX tags which uses another frequency compared to most generic RFID readers.
The Rapsberry Pi
When I started thinking of this project the Raspberry Pi had become available, as well as the camera board. So I quickly decided I will use this for my project.
One problem was that OpenCV does not work natively with the Raspberry Pi camera which interfaces directly via the CPU. Thankfully Pierre Raufast fixed this problem by rewriting the raspistill program to work with OpenCV, and Emil Valkov simplified this into a library that can easily be used with an API similar to the normal OpenCV camera API.
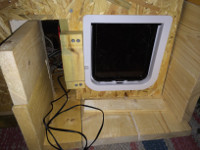
Building the cat door


The cat door we built and installed as a replacement for our basement window was kind of a temporary solution. At first we had simply thought we would remove it for the winter and put the normal window back in since we live in northern Sweden where it easily can go down to -30C.

However, since I was thinking of building this automated cat door which obvisouly would need some extra space to fit, I instead decided to build a small house in front of the cat door that's insulated so we wouldn't loose too much heat through it as well.
My idea was to have the cat first go through a small corridor that I would build in front of this small cat house, and at the end of this corridor a first cat door would be installed. This would be the cat door that I could lock automatically if any prey was detected.


This design would also have the benefit of insulating the outside from the inside via two cat doors, instead of just one. I could also put in a third door at the beginning of this corridor to get even less cold air flowing in.
To make it easier to develop this thing, I built the corridor in a way that made it removable, so I could easily bring it in while developing the software and testing the door locking and such. I built the frame of it in place in front of the cat house, and made it fit into it's opening.


The idea for this "capture" corridor was to keep the camera and electronics in half of it, and then make a small passage for the cat to actually go through in the other half. The corridor therefore needs to be wide enough so that the camera, with it's field of view, can get a good enough picture of the cats profile.

The walls of the corridor that the cat walks through is made out of acrylic so that the camera can see through it. I made the roof out of plywood and placed it quite low so that shE haS to crouch when going in. This is so that the placement of the head againsT the background will be very consistent when taking the picture to match against. Also making the roof low makes it so her back rubs against the ceiling where the RFID readers will be located (she has the RFID chip in her neck).
To decide how far away the camera needed to be I persuaded my cat to keep still in front of the camera att different distances (not as easy as it sounds). The optimal distance turned out to be about 30cm. So I decided making the corridor 60cm would be enough to fit everything.
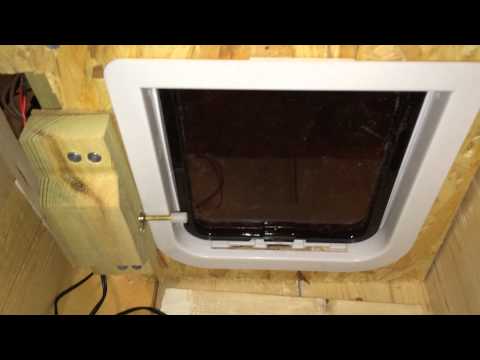
Locking mechanism
The actual cat door I decided to use was a very simple store bought one with some manual plastic locking latches. I was not interested in using these for the actual locking, or buying some fancy expensive cat door with a built-in electronic locking mechanism.
Instead my idea all a long was to use a 12V solenoid that when given power will push a small pin out. This pin will then block the door so it cannot be opened. My first idea was to build my own circuit to control this solenoid via the 3.3v Raspberry Pi GPIO pins. Since the solenoid requires a 12V power supply, it cannot be directly controlled via the GPIO pins.
After doing some googling, I instead found a nice and cheap board named Picoborg that lets you connect an external power supply (in my case a 12V one), and then control up to 4 devices using the RPI GPIO pins.


To attach the solenoid next to the cat door I used my band saw to create a piece of wood that would hold it in place.
Method of detecting
Since I had found the Flo Control project that had solved the problem with detecting cat prey, I knew a working method in theory for how I could detect the cats face and eventual prey.
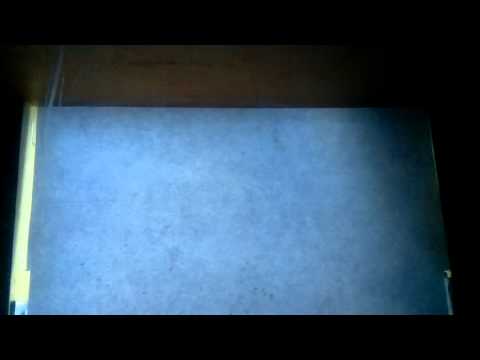
The basic idea is to make the cat go through a corridor. On one side of the corridor there's a camera, on the other side there's a backlight. This enables us to take a well controlled picture of the cats profile. Since cats keep their prey in the mouth, we can focus on the cats snout when doing the matching. We now use a saved image of the cats snout without any prey in it, and scan the image for that, if we get a good enough match, we can be certain the cat has no prey, if not we lock the door!
This method is a lot simpler than using more advanced techniques used for pattern matching, such as haar cascades or similar things normally used for facial detection in humans. Keep It Simple Stupid!
Backlight

Since the detection method I choose for this solution requires a backlight, I decided to use a 12V LED light that I then also can connect to the Picoborg and be able to control it via the RPI GPIO pins. First I tried using a normal LED light for this, but it turned out that the background would not be uniform enough, giving me a bad profile picture.


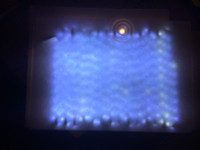


Instead I decided to tape a cheap 5m LED light strip bought on ebay on to the back of some plywood to create one big backlight. By placing a piece of acrylic with some paper taped on to it in front of it, I got a more scattered and uniform light source.
RFID readers

Our cat has an RFID chip implanted in her neck for identification. This chip cannot be read using most generic RFID readers on the market, so I had to find one able to read the ISO 11784/11785, FDX/HDX tags.
The commercial products meant for veterinarians and the like are crazy expensive and not very customizeable to work in a scenario like mine. But eventually I found a great little company in Australia that creates cheap animal RFID readers for ease of use in DIY projects like this. I bought two of the FDX-B/HDX RFID Reader Writer with external antenna and USB port readers.

My idea was to use two RFID antennas, one on each end of the corridor enabling me to detect in which direction the cat is going, in or out. As I mentioned earlier, I made the ceiling in the corridor quite low, so that the cats back will brush against it as she walks through. This way I can get the RFID chip to come as close to the readers as possible. My first idea was to simply have the antennas lying on top of this thin roof, since the readers specs says they can read at a distance of about 10cm.

However, from some testing it turns out I cannot read the tag unless I brush it against the cats skin, so doing it this way will not work. Most likely I could probably extend the range of the antenna by tuning it as specified in the datasheet, but this will be my last resort. In the mean time I'll try to put the antennas in a way that gives maximum contact with the cats neck.

The RFID readers doesn't come with the antenna soldered on, so I had to do that. Since the antenna wires are really thin, and it would be very easy to break the antenna, I made a small enclosure for them made out of some left over plastics from some blister packaging.
Here's some tests from reading the RFID tag of my cat:

Software
When creating the matching algorithm as described above, I decided to first develop it as a prototype in the Python version of OpenCV, since this would enable me to use my laptop (a lot faster) instead of the Raspberry Pi.
To test the matching I had to have some kind of input data to test against. Using some cat candy I managed to get Higgs to walk through the corridor while I had the raspivid program recording.
I then used frames from this video to create the matching algorithm. Here are the steps that the matching goes through to determine if Higgs has prey in her mouth or not:
OK
Original image:

Turn the image into a grayscale image:

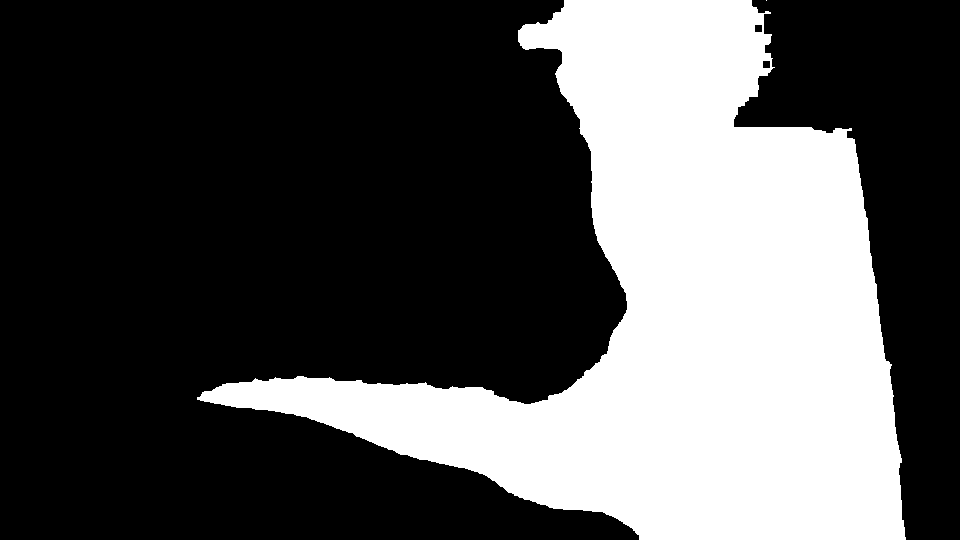
Threshold the image (Every pixel above a certain value becomes black, and the others white) so that we get a binary image:

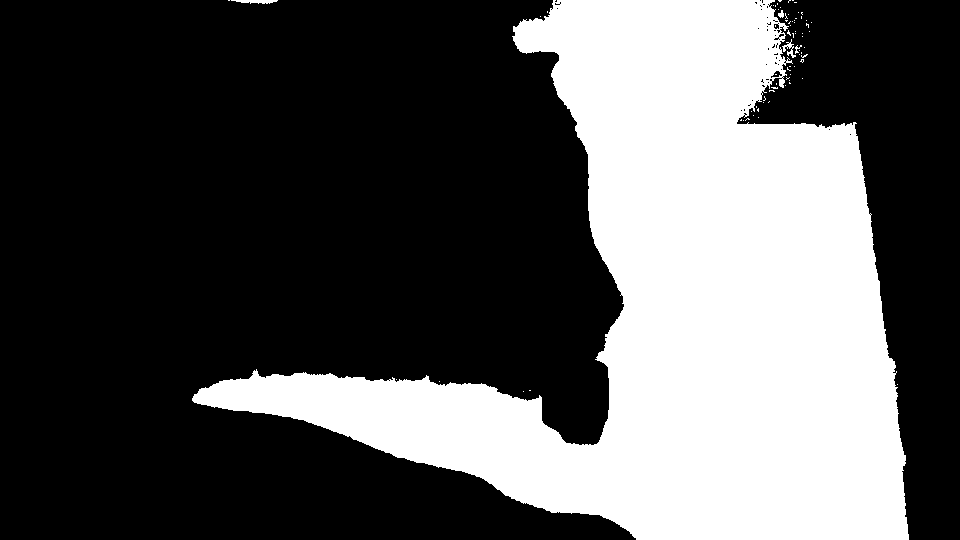
We now remove some noise from the image:
We now use a previously saved image of the cats snout and scan it over the image:

This creates a "heatmap" of where this snout image matches the best on the input image. The values of this image is between 0.0 and 1.0, so that the best match on the image has the highest value. We can use this maximum value to choose a threshold of how good a match we decide is a snout with no prey in it:

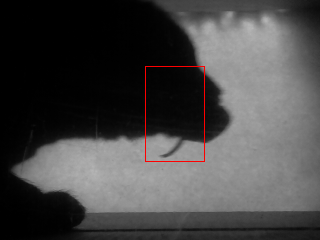
Finally we can mark on the original image where the best match was found:

Not OK
To determine the threshold for the maximum value to consider a good match, we also need some images with a negative input. That is, an image of Higgs with a mouse or other dead animal in her mouth. Since I didn't have any real input data with this scenario yet, I simply drew a mouse in her mouth in an image.
Same steps as above but with a prey in her mouth:


If we compare the two match maps we can easily see the difference:
The max value in the second image is lower because since no good match can be found.
From some test with different input images I decided that a good threshold value as mentioned above is 0.8, on the 0.0 to 1.0 scale, where 1.0 would be a perfect match.
From Python prototype to C Version
After creating my prototype in Python and getting it all to work, I then moved on to creating the same algorithm in a C library. I made it a library so that I can easily compile a test program to test only the algorithm on another platform than the Raspberry Pi. And then write a final program that is used for the actual image recognition running on the Raspberry Pi separately.
After writing the C verison and using the Raspberry Pi camera board to capture the images, it was obvious that using a full resolution image at 1080p was a bit too much to handle for the CPU, so instead I changed the resolution down to 320x240 and made it gray scale which made it able to capture at ~20 fps instead of 1-2 fps at the actual matching moment.
The matching is not on at all times, only when the middle part of the image becomes dark does it start to look for the cat snout. After the darkness has been detected the program saves 4 images in a row, if 2 of these are above the threshold the match is considered a success and the door will be left open. Otherwise the solenoid is turned on and the door is closed.
I also made it possible to run external programs at different important places in the code. For instance on an RFID match, image recognition completing, or the images being saved. This makes it easy to add interactive behaviour to the system by writing small programs that for instance uploads the image to the internet.
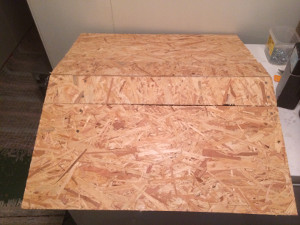
Most of the testing was done without a live camera image, but here's a picture of my test setup when I tried it:


When developing this final program I needed to test it using the live Raspberry Pi camera to see if it matched OK. Trying to persuade my cat to walk through the corridor was not really an option though, so instead I printed a frame from my input video I had captured while bribing her with some cat candy, and then glued that on to some cardboard. This cut out could then be used to emulate the cat entering the corridor, which is very useful when fine tuning my program.
Here is the usage options of the final (as of writing) program:
Catcierge Grabber v0.2.0 (C) Joakim Soderberg 2013-2014

Usage: ./catcierge_grabber [options]

 --snout <paths>        Path to the snout images to use. If more than one path is
                        given, the average match result is used.
 --threshold <float>    Match threshold as a value between 0.0 and 1.0. Default 0.8
 --lockout <seconds>    The time in seconds a lockout takes. Default 30s
 --lockout_error <n>    Number of lockouts in a row is allowed before we
                        consider it an error and quit the program.
                        Default is to never do this.
 --lockout_dummy        Do everything as normal, but don't actually lock the door.
                        This is useful for testing.
 --matchtime <seconds>  The time to wait after a match. Default 0s
 --match_flipped <0|1>  Match a flipped version of the snout
                        (don't consider going out a failed match). Default on.
 --show                 Show GUI of the camera feed (X11 only).
 --show_fps <0|1>       Show FPS. Default is ON.
 --save                 Save match images (both ok and failed).
 --highlight            Highlight the best match on saved images.
 --output <path>        Path to where the match images should be saved.
 --log <path>           Log matches and rfid readings (if enabled).
 --config <path>        Path to config file. Default is ./catcierge.cfg or /etc/catcierge.cfg
                        This is parsed as an INI file. The keys/values are the same as these options.

RFID:
 --rfid_in <path>       Path to inner RFID reader. Example: /dev/ttyUSB0
 --rfid_out <path>      Path to the outter RFID reader.
 --rfid_lock            Lock if no RFID tag present or invalid RFID tag. Default OFF.
 --rfid_time <seconds>  Number of seconds to wait after a valid match before the
                        RFID readers are checked.
                        (This is so that there is enough time for the cat to be read by both readers)
 --rfid_allowed <list>  A comma separated list of allowed RFID tags. Example: 999_000000001007

Commands:
   (Note that %0, %1, %2... will be replaced in the input, see --cmdhelp for details)
 --match_cmd <cmd>      Command to run after a match is made.
 --save_img_cmd <cmd>   Command to run at the moment a match image is saved.
 --save_imgs_cmd <cmd>  Command that runs when all match images have been saved to disk.
                        (This is most likely what you want to use in most cases)
 --match_done_cmd <cmd> Command to run when a match is done.
 --rfid_detect_cmd <cmd> Command to run when one of the RFID readers detects a tag.
 --rfid_match_cmd <cmd> Command that is run when a RFID match is made.
 --do_lockout_cmd <cmd> Command to run when the lockout should be performed.
                        This will override the normal lockout method.
 --do_unlock_cmd <cmd>  Command that is run when we should unlock.
                        This will override the normal unlock method.

 --help                 Show this help.
 --cmdhelp              Show extra command help.

The snout image refers to the image of the cat snout that is matched against.
This image should be based on a 320x240 resolution image taken by the rpi camera.
If no path is specified "snout.png" in the current directory is used.

Signals:
The program can receive signals that can be sent using the kill command.
 SIGUSR1 = Force the cat door to unlock
 SIGUSR2 = Force the cat door to lock (for lock timeout)
Finalizing the building
After being satisfied with the software and that it works I started building the walls and roof on the cat door corridor.
From start I wanted the entire thing to be light enough for me to lift it around easily, so that I can take it inside if I want to work on it. For this reason I knew that both the walls and roof needed to be removable.
Walls


To make them removable I put two screws on the top of the frame. I then put two sash angles on each wall, the holes in the middle of these then match up to the screws on the frame. This arrangement enables me to hang the walls on the frame and remove them when necessary.


Here both walls are hung on the frame:

I decided to make the front non-removable since the entrance and everything would make it less convenient. And the extra weight isn't really a problem to be able to move it around anyway.
I also made a small roof just above the entrance so that I can put the RFID antenna under it. Plus it will keep rain and snow out.


Roof
Finally I built the roof out of some plywood. To keep the water out I put some "syllpapp" on it (I don't know what it's called in English, but it's used as a moisture stop/isolation between concrete and wooden beams).


Installation
Finally I could install the corridor. Note that the entire thing is standing on top of some garden tiles to get it a bit off the ground, so that it will stay dry as the snow melts.


Testing phase
For the first time I was now hoping for Higgs to bring something in so I could verify the cat door was actually detecting correctly.
And finally it happened!... Except that it did not detect the mouse she had brought in successfully. Apparently my hand drawn test image were not realistic enough.
Here is two frames with the mouse in her mouth:


Here with the best match highlighted, with a match result of 0.844146 and 0.837592 respectivly. Which is well above the threshold of 0.8.


However, I didn't think the solution was to raise the threshold, since some of the OK matches are not far enough from 0.84. Instead I think a better solution was to change what part of the cat snout is matched against.
The original snout that I used:

Instead I changed it to this one that includes some more area below the chin. You may notice it looks a bit squished compared to the first one. That's because I realized that the native image of the camera does not have a 4:3 aspect ratio, but rather 16:9. So my resolution of 320x240 is not really the correct aspect ratio, I should have used 320x180.

Match results for this new snout image with Higgs's victim in her mouth:

Here is a comparison of all the good matches since I started testing until Higgs first delivery. As you can see, the new matcher fails in some cases. This is not much of an issue though, because it only happens at the edge pictures anyway. This normally will fail anyway since the snout is most often completely outside the frame anyway.


Continued test phase
Cold
Of course the change mentioned above didn't solve all my problems. All my testing so far had either been done inside, or when the temperature was around -5C... Then when the temperature started going down to around -30C in January I got this:

... which resulted in a spam of "lockouts" happening because the program thought something was blocking the frame. I realised what the source of the problem was right away, since the Raspberry Pi camera isn't rated to work in subzero temperatures (The raspberry pi itself had no problems however).
So I had to find a solution for this. The part of the cat house the camera is in, isn't isolated, so warming all of it was out of the question. Instead I decided to build a small box with a window for the camera, and some power resistors + a thermostat to keep it warm. I bought a really crappy 12V thermostat kit at the local electronics shop that did the job (however I've already bought a new one on ebay that will replace it):


Darkness
After fixing the cold problem, everything worked well for about a week, until suddenly my homemade backlight went dark. When stuff like this happens I'm glad I decided to make everything removable, so I could simply remove the wall and remove the backlight to examine it.
I took it inside and realised that my sharp bends I made in my original backlight had made the waterproofing crack in the cold. At first I thought this was the reason for it going black. Later it turned out it actually was a glitchy wiring job in the cat house itself.... Anyway I remade the thing more properly without bending the led strips and instead soldering them together, and finally hot gluing it all:


Bugs and other issues
There wasn't only hardware problems that gave me problems however. I also had a bunch of software bugs, mostly due to the fact that I hacked this together as I went, and didn't really have a very coherent design from the start. I tried to clean things up a bit at least by creating a state machine diagram to make the transitions made by the program a lot more clear cut:

Improved algorithm
The algorithm improvements mentioned above only helped so far. I soon realised that simply matching against a single tweaked image of the cat snout wasn't enough, so instead I got the idea of using multiple snout images for the match and deciding on the average of their match result.
I updated my python prototype to test this hypothesis using all the accumulated input pictures so far. Testing a bunch of different combinations of snout images, I soon came to the conclusion that 2 was enough. The best results that I got was using these two images:

One that focuses on only chin area, and one modified image that matches the entire head. To determine that these where the best, I ran the prototype program on a bunch of the input images I had and tried to find the combination that reject all images with mice in the cats mouth, and didn't reject the normal ones. Here's such a montage for the pictures above:

Haar matcher
So after evaluating and tweaking the template matcher, I decided to try a more advanced method using Haar Cascades (a very common method used for facial recognition).
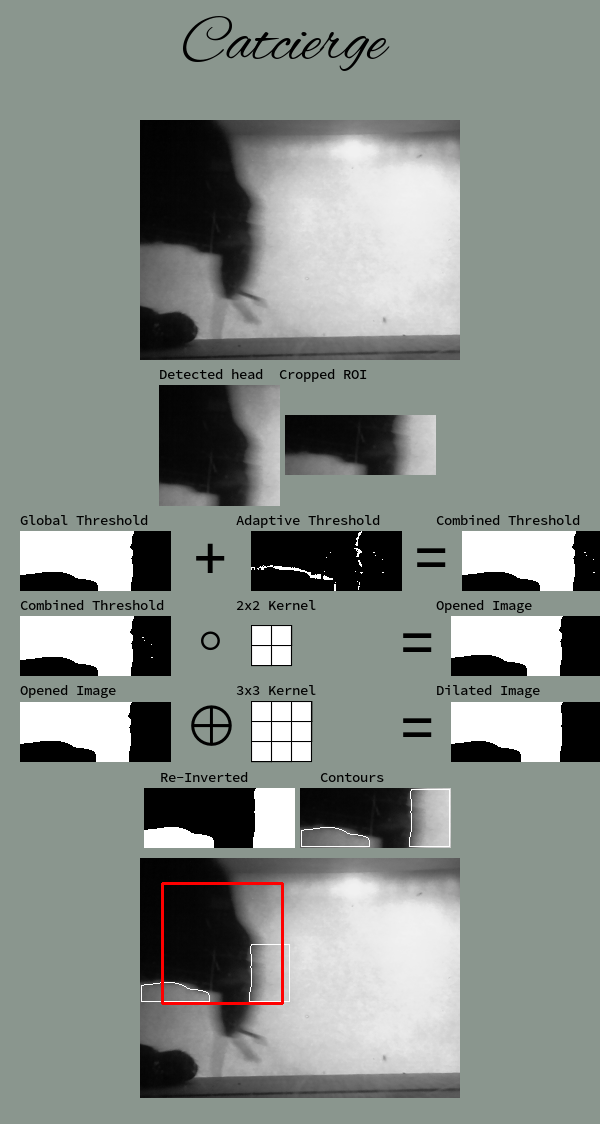
I might go more into the details in the future, but this approach is a lot faster than the template matcher, as well as more successful. The main idea is that the haar cascade is trained to find the cat head in an image. Then after the head has been found, it looks at the lower portion of the cats face, to see if something is "hanging down" below the chin (most likely prey!).
Here's an example of how an image is processed:
Funny pictures
If you've read this far you should be rewarded with some funny pictures!
Kamikaze bird
This one I really don't understand... Remember that these images are all taken within 1 second. So it looks like the bird is chasing the cat:

However, a more likely scenario is that this is due to a software bug, and that the bird came soon after, not knowing this was a cat house.

Here my wife went to investigate, and waved to me at the same time... She did not see any bird (!?):

Squirrel
Birds aren't the only curious little creatures investigating the premises:

Bye bye for now!
